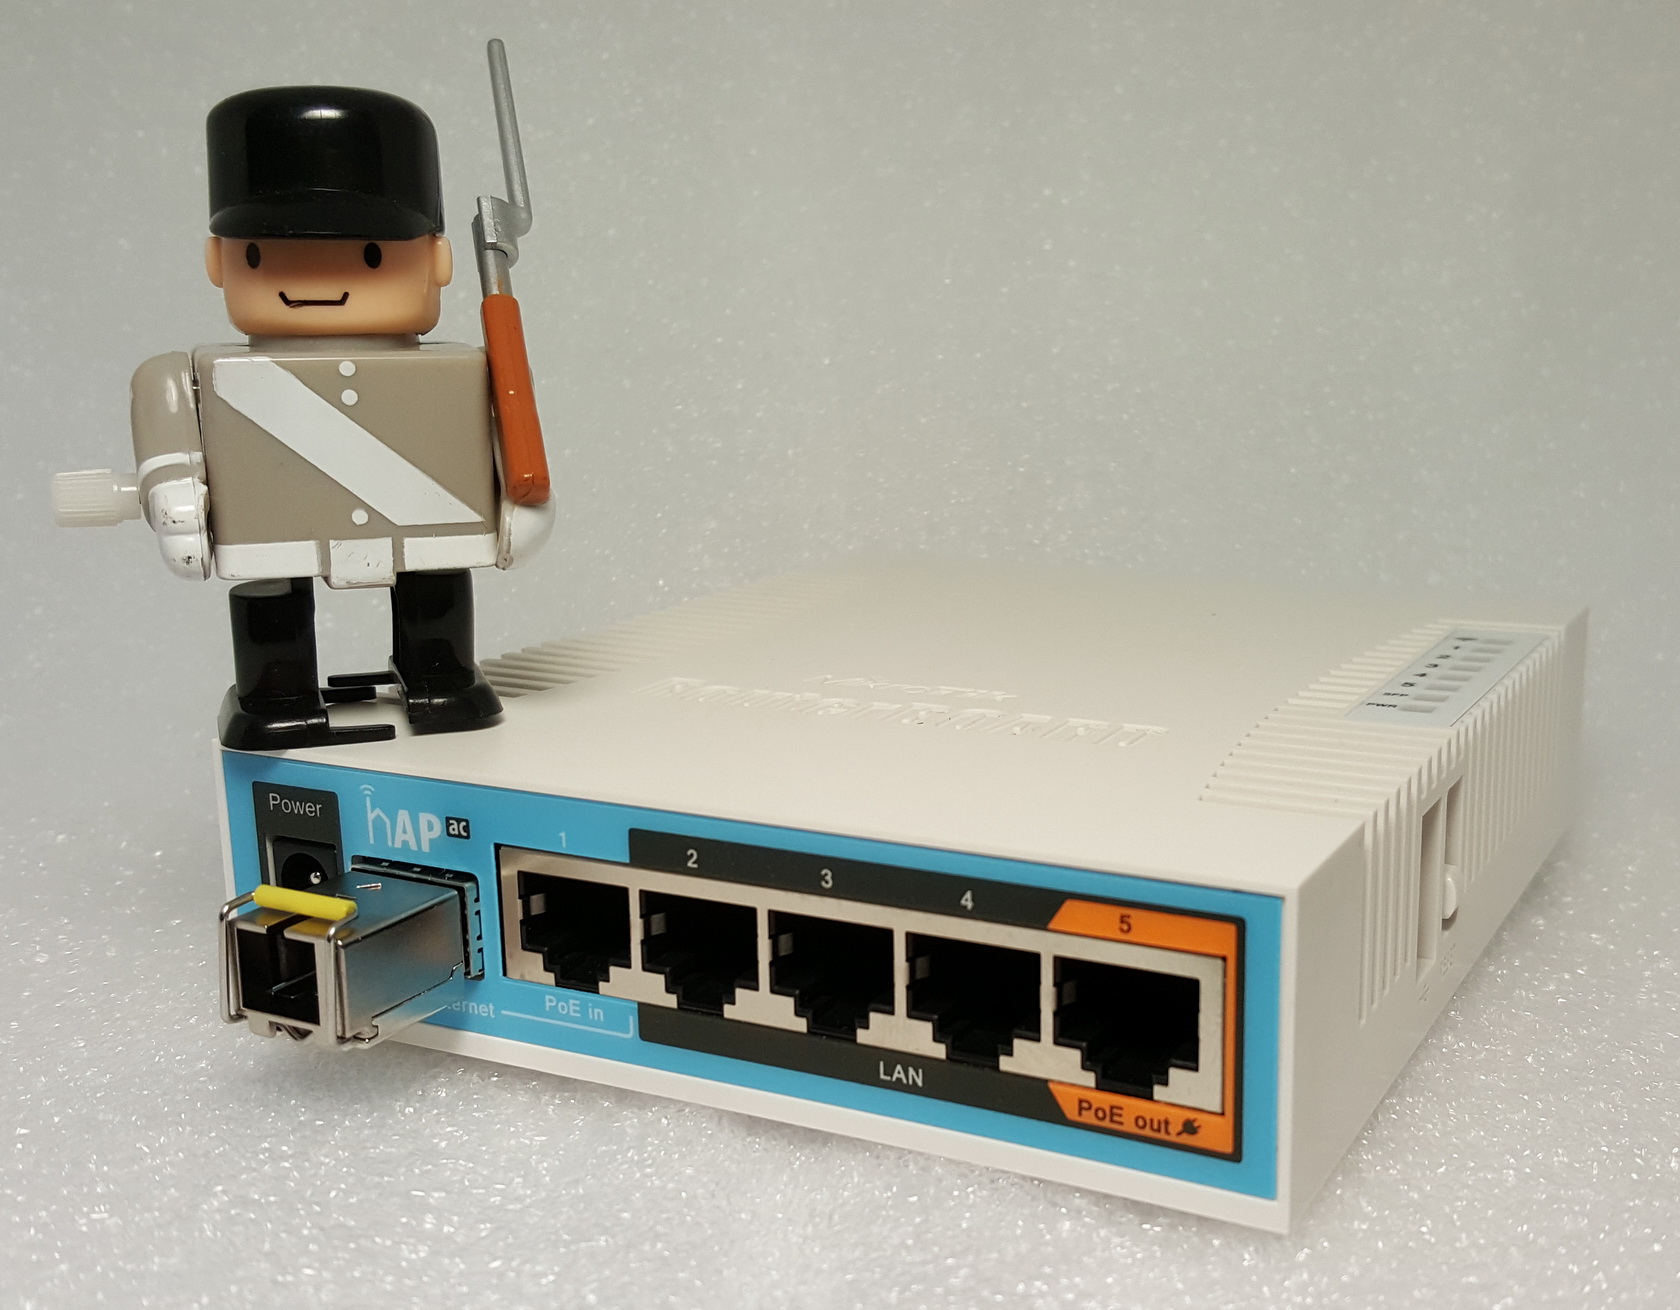
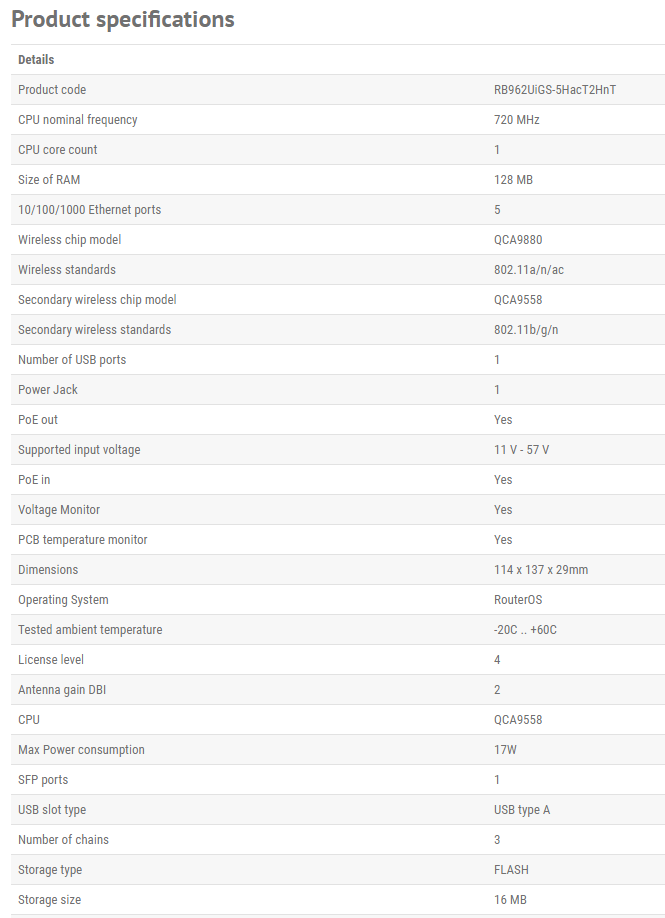
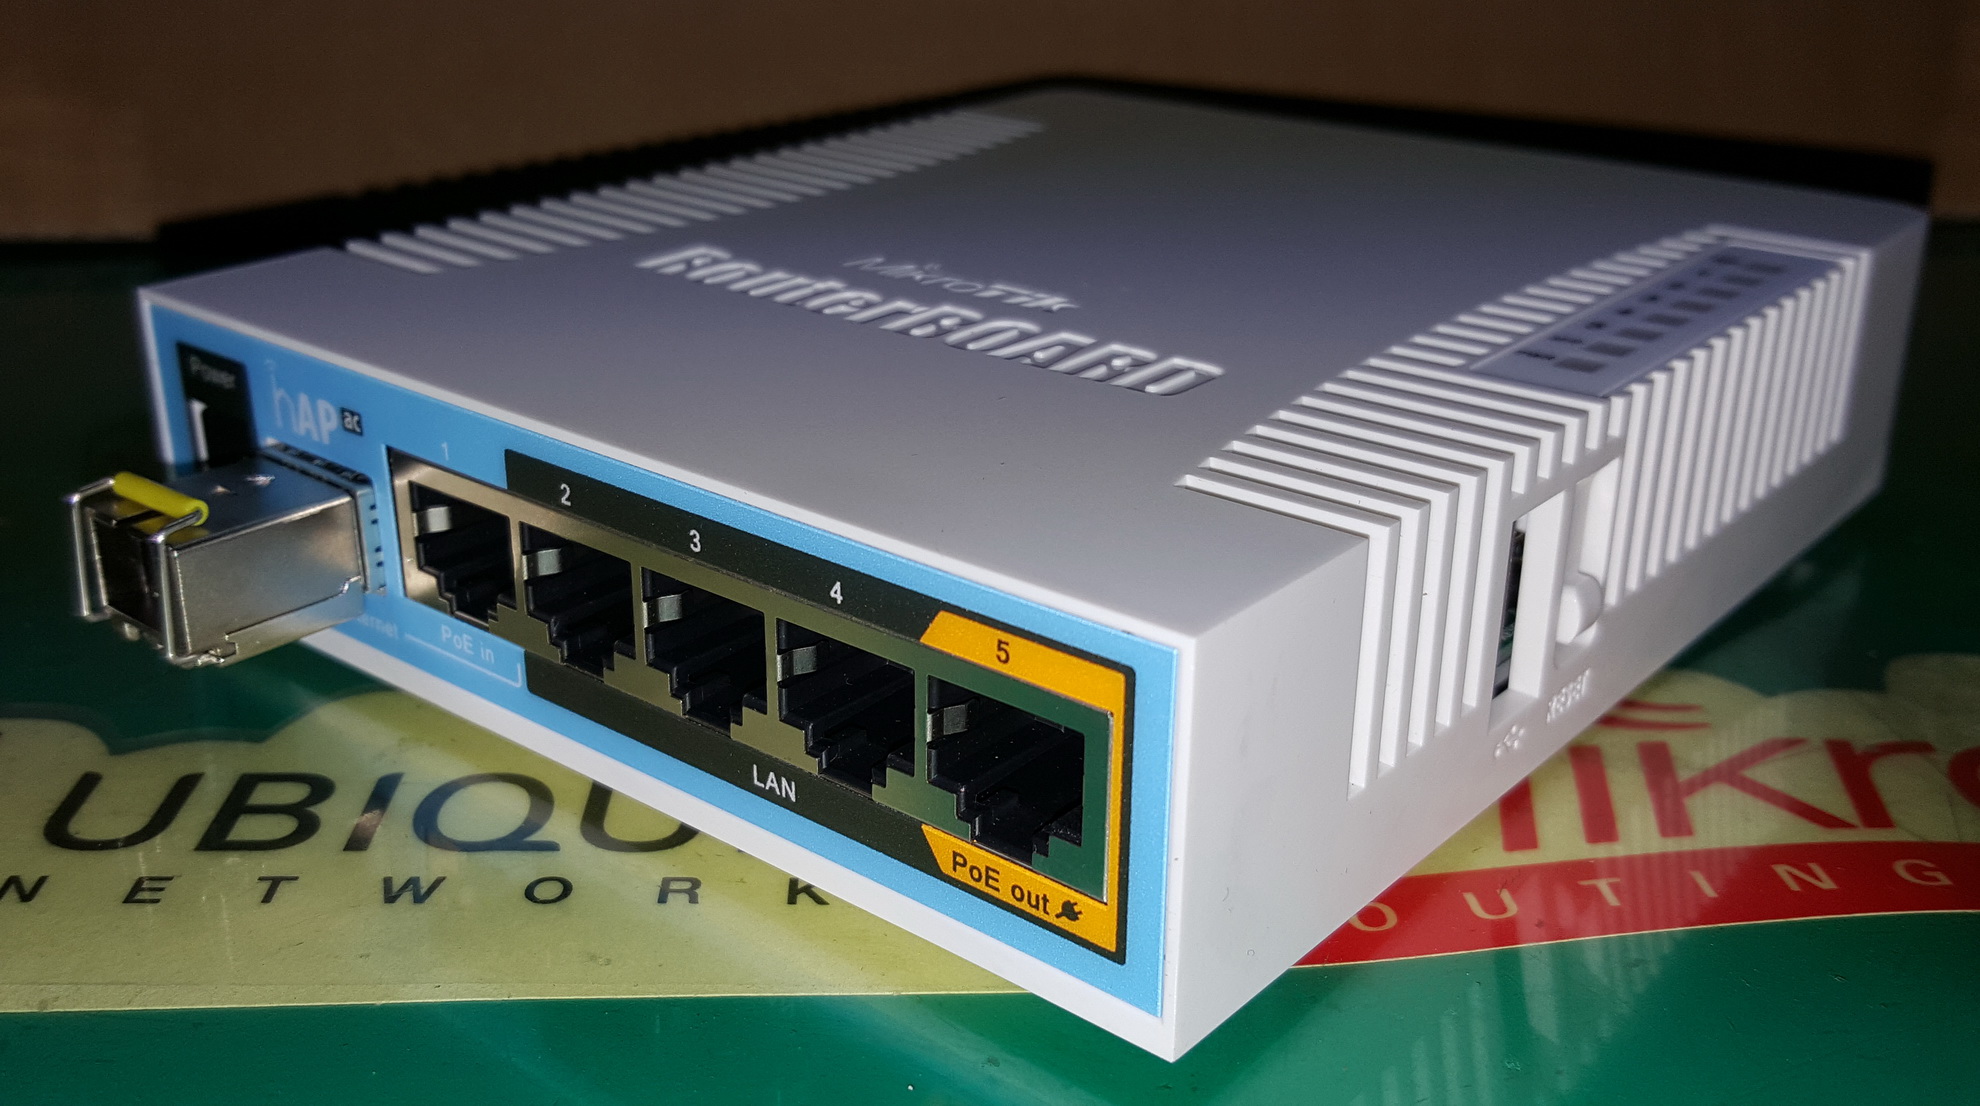
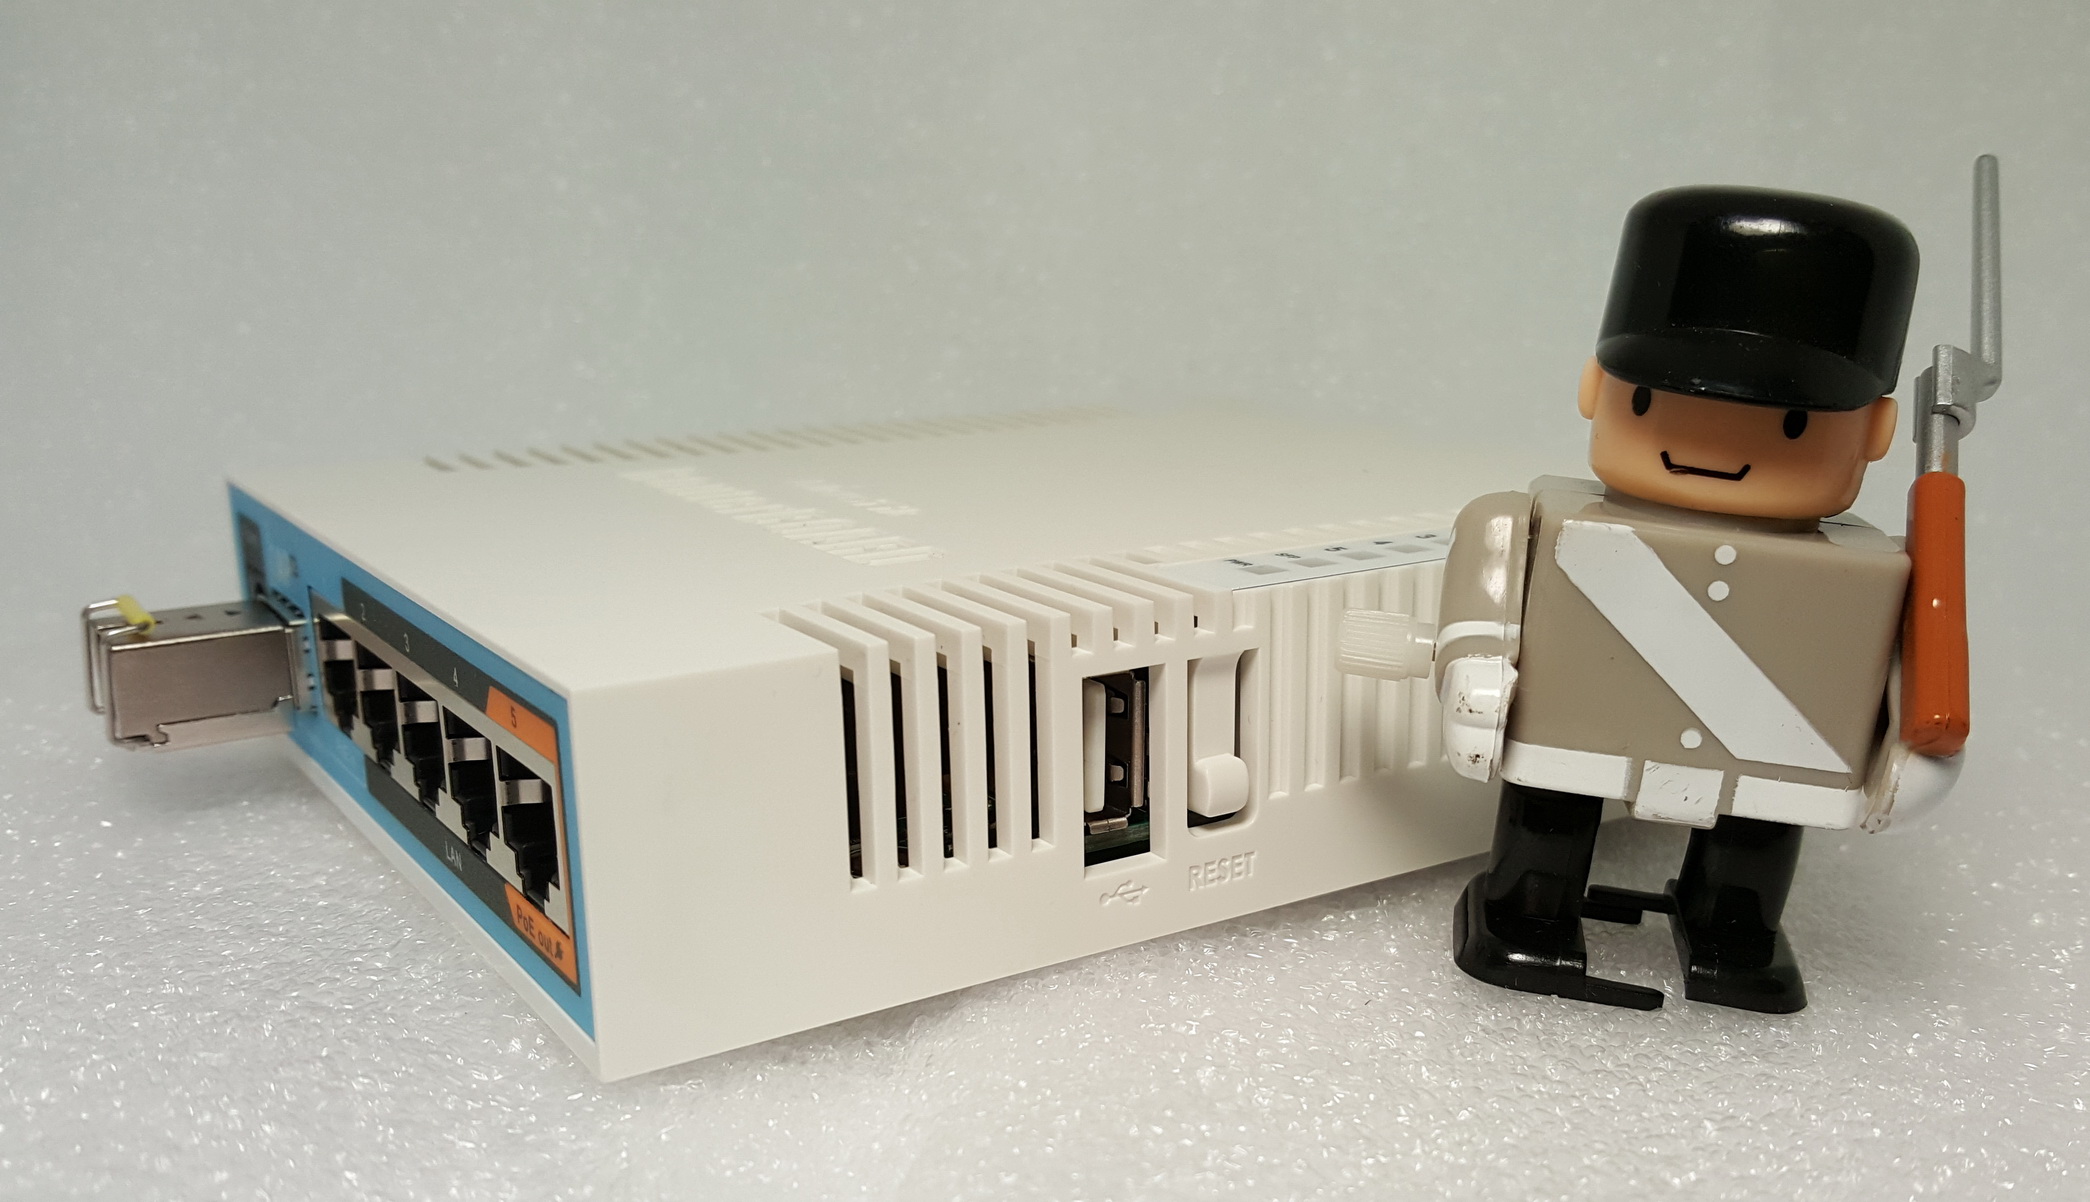
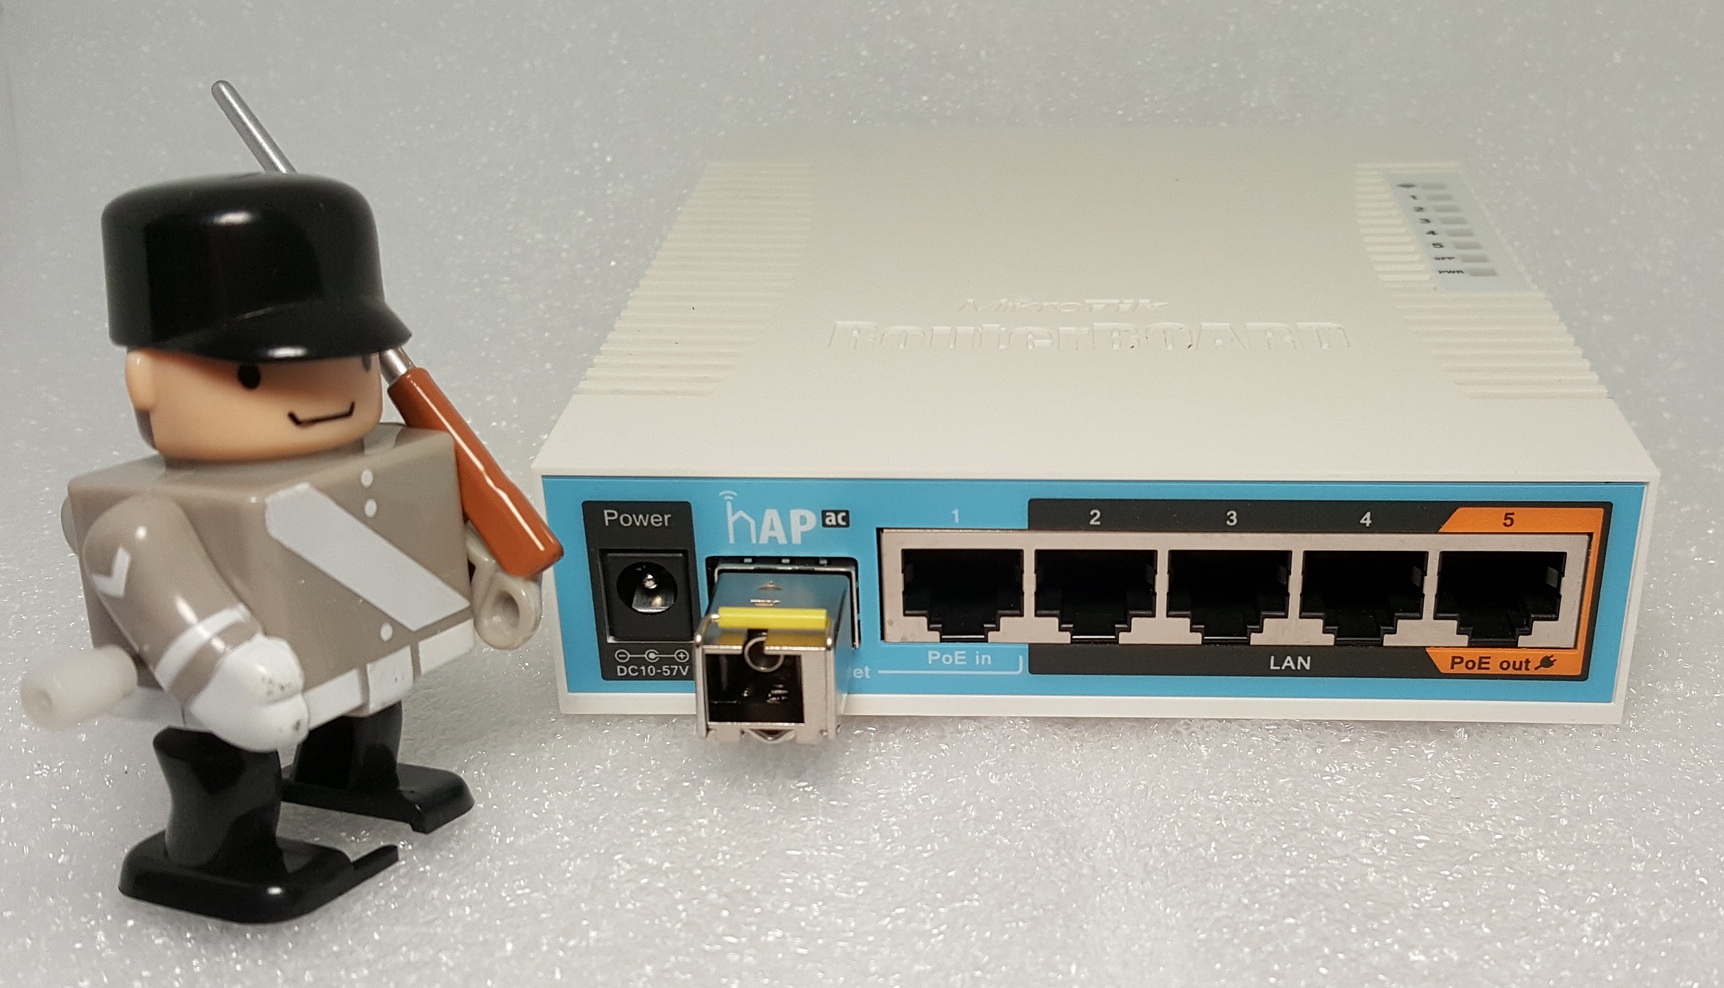
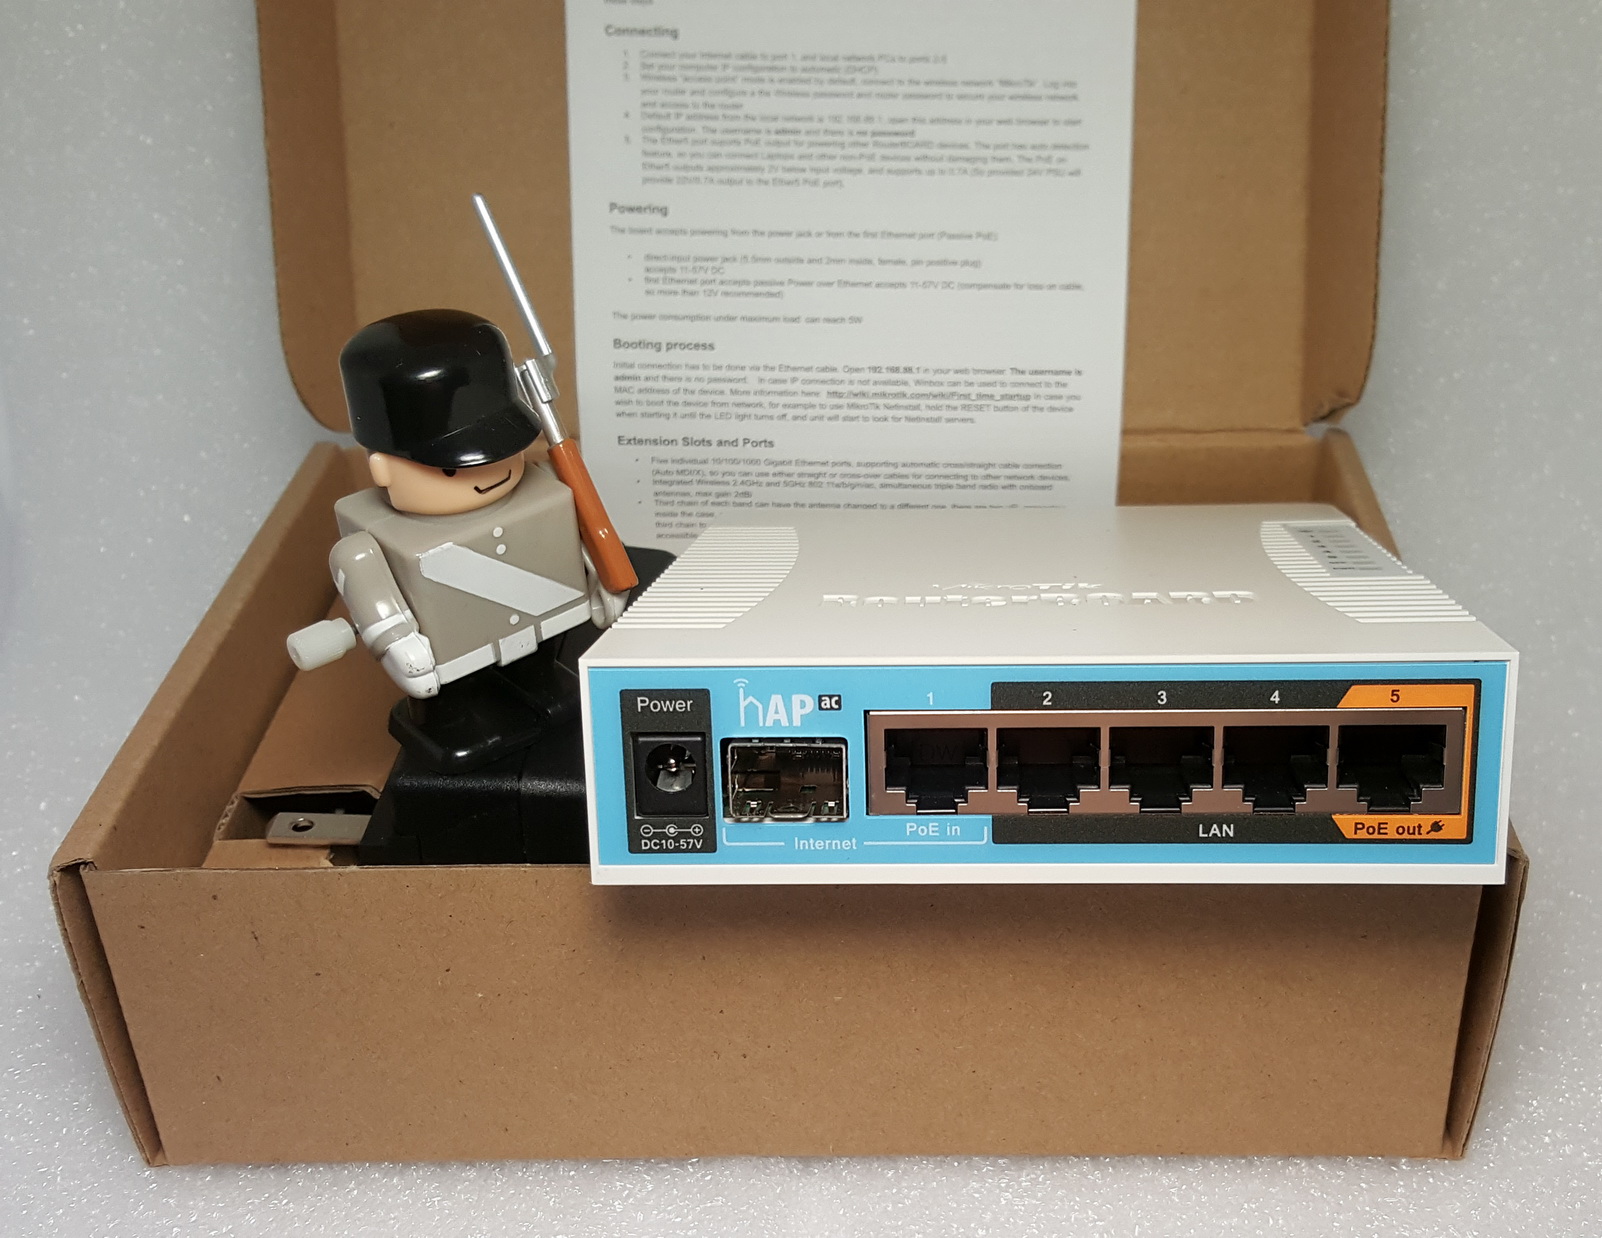
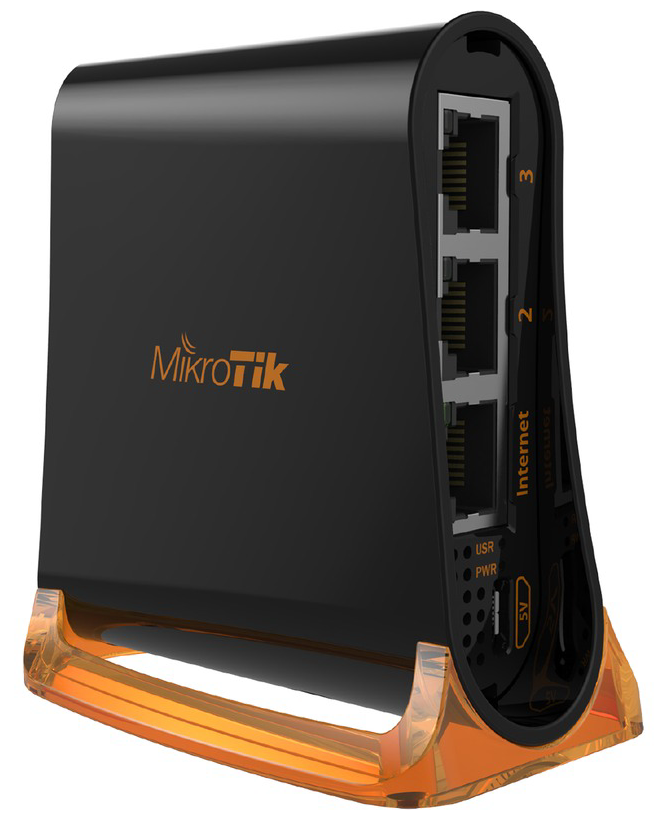
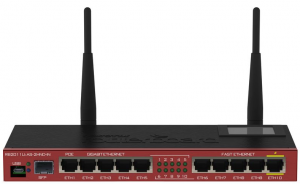
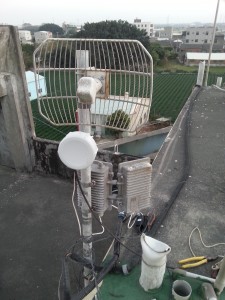
MikroTik AC 路由器 hAP ac
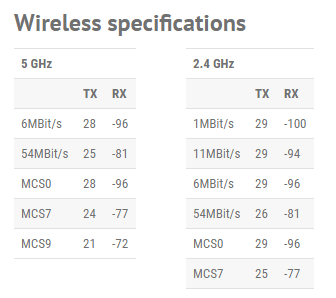
1.2.4G/5.8G 雙頻AC WiFI.
2.天線為3T3R
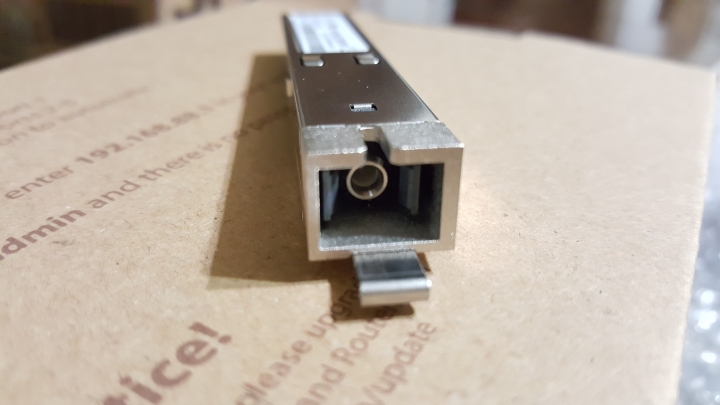
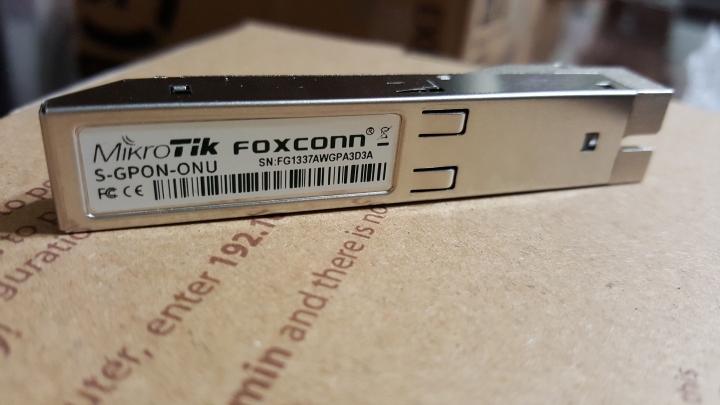
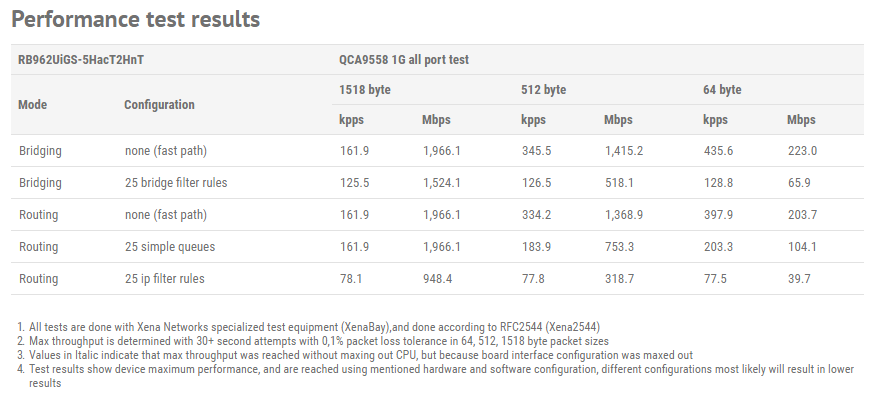
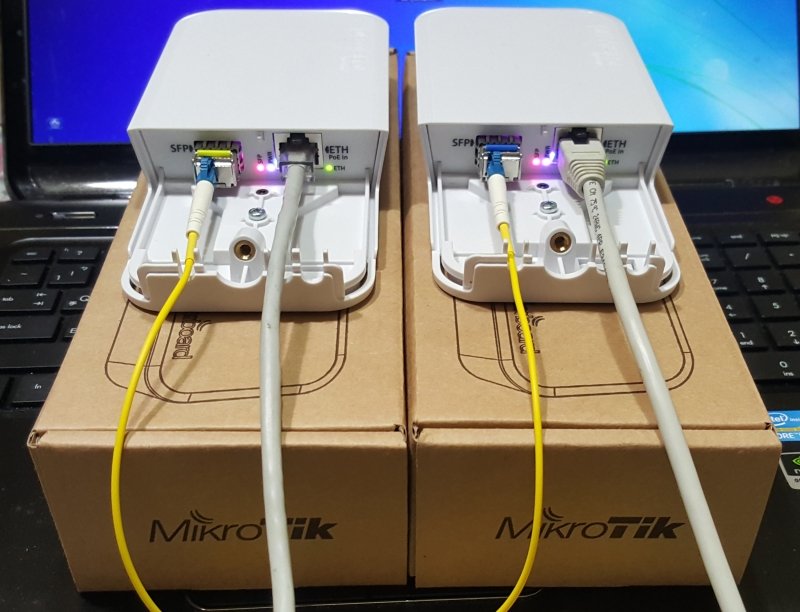
3.支援1.25G SFP 光模塊.
4.USB插槽可插LTE 4G USB網卡.
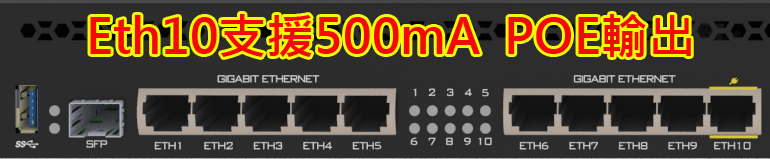
5.電壓支持到DC 57V,以及第五口具備POE OUT.
更多詳細的介紹請參考余松老師的網站介紹
RB962UiGS-5HacT2HnT官方網址


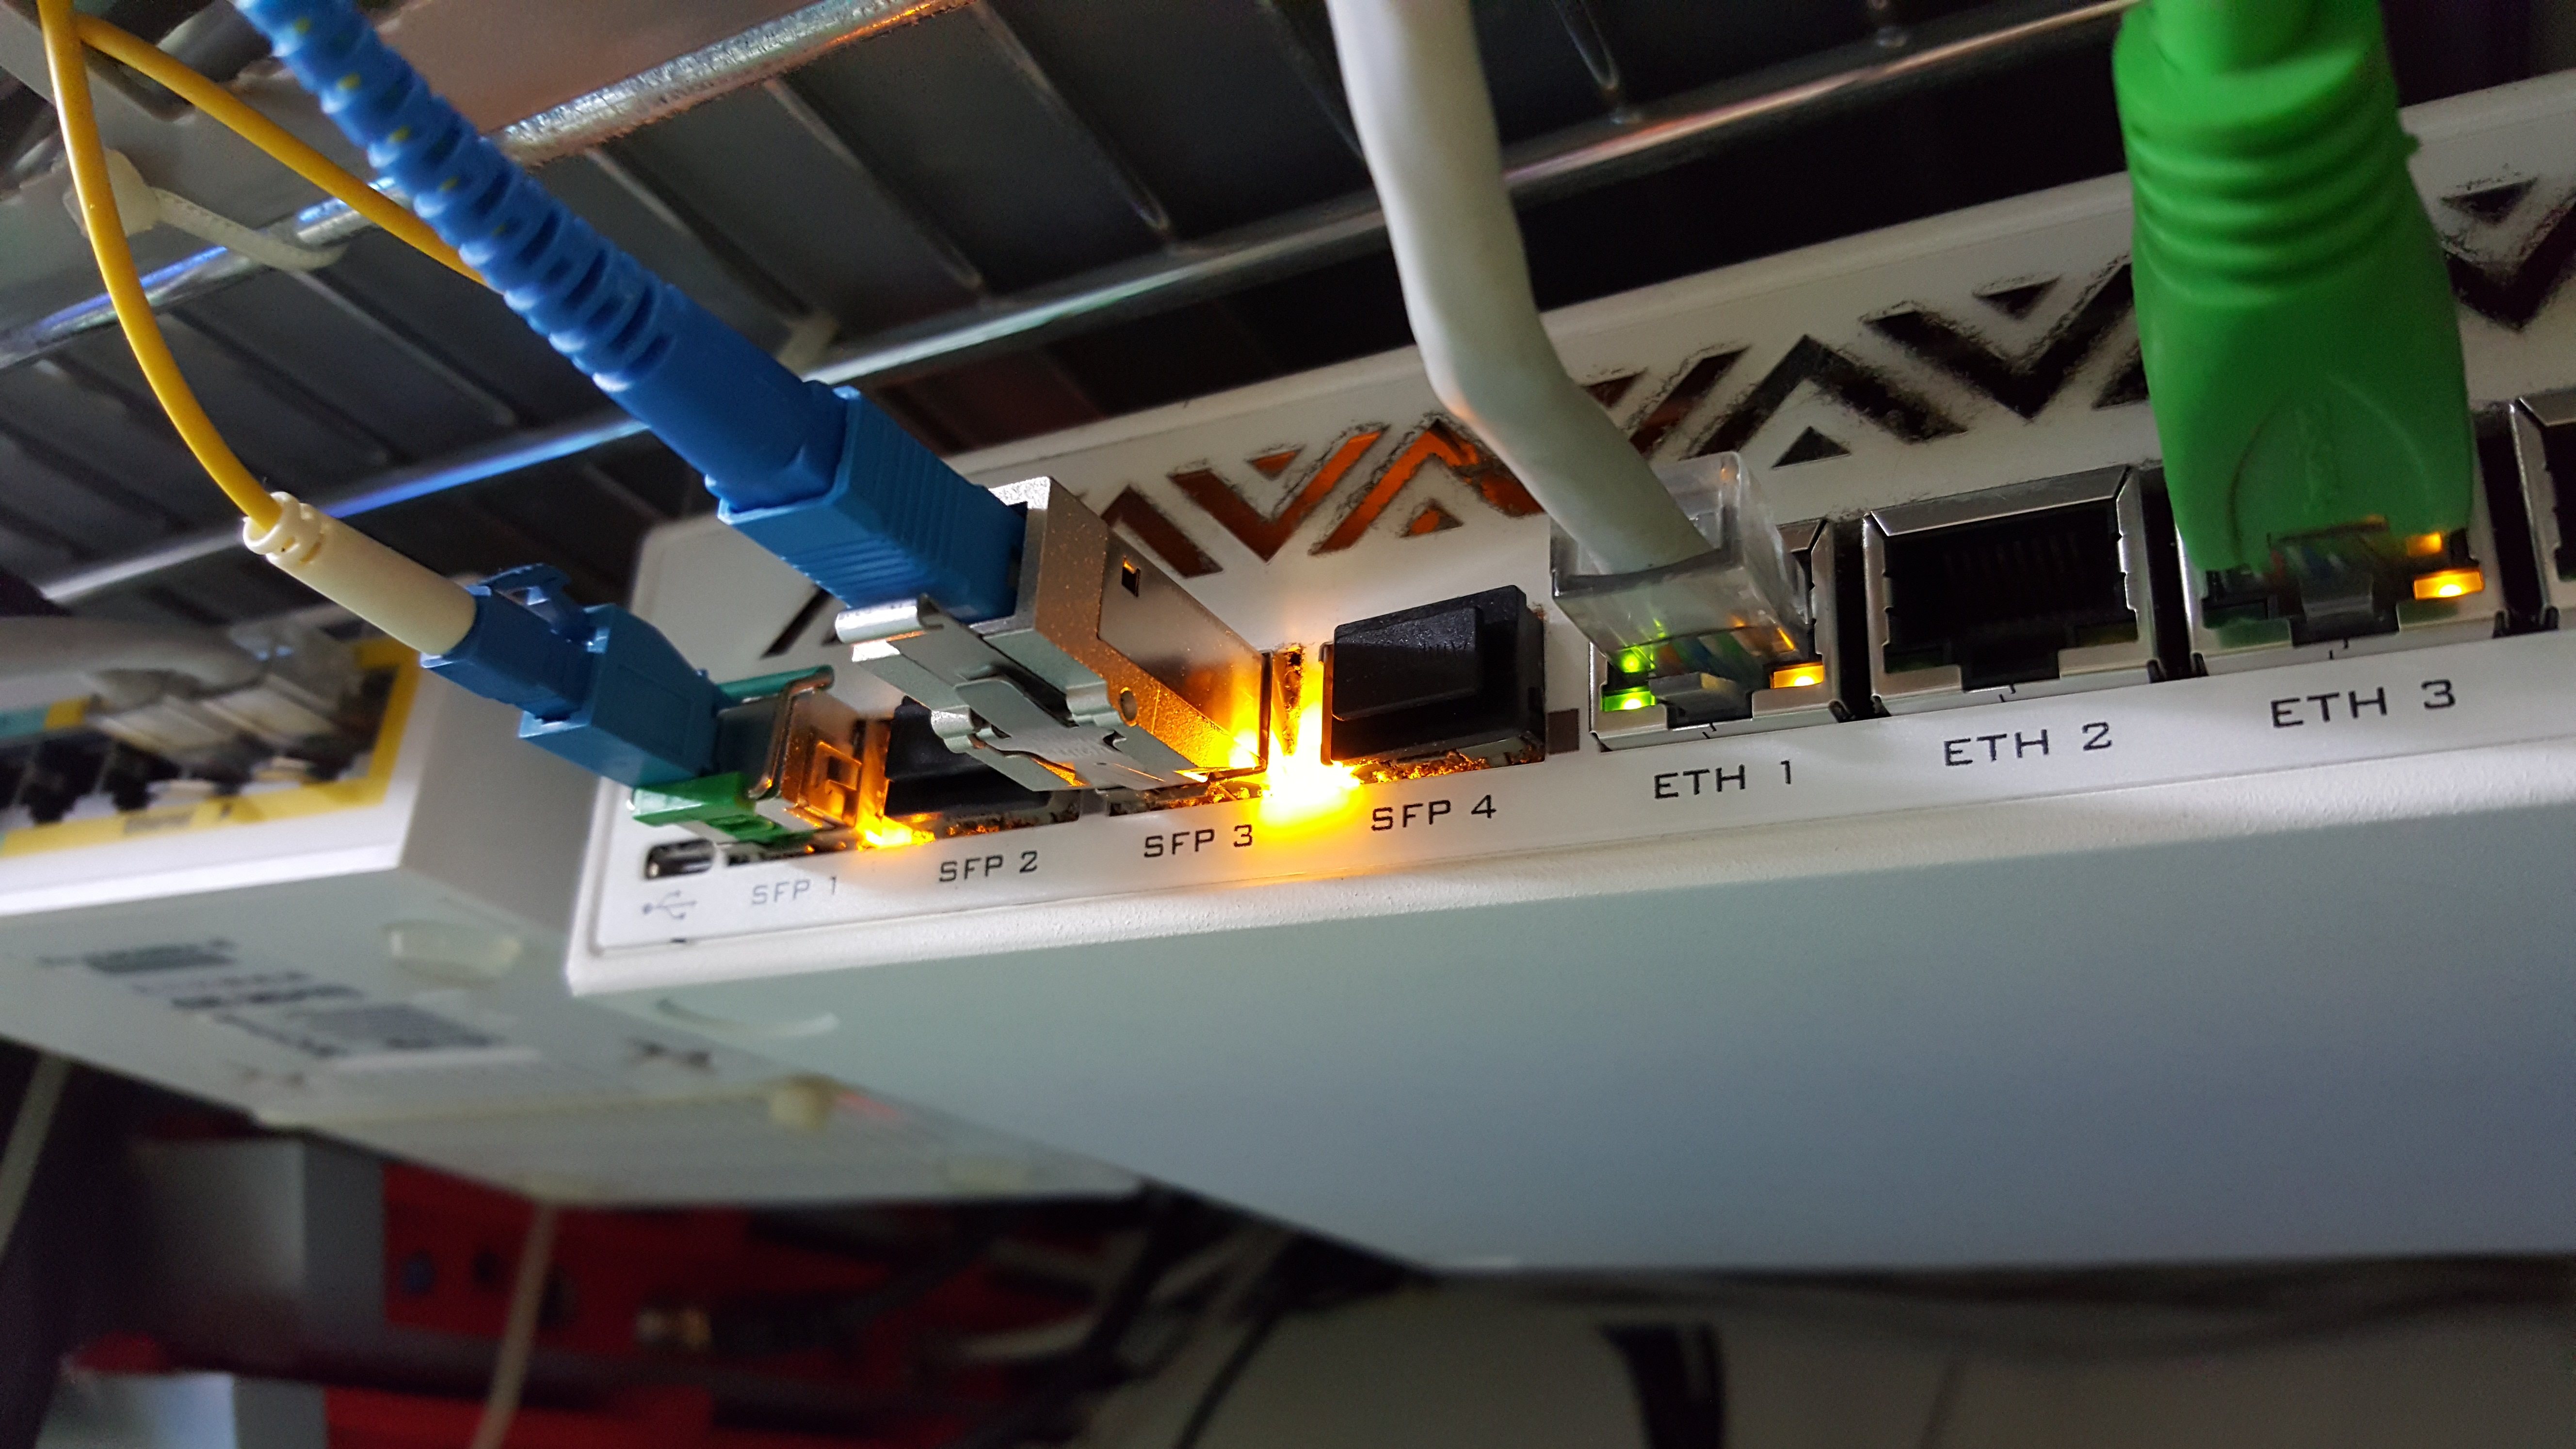
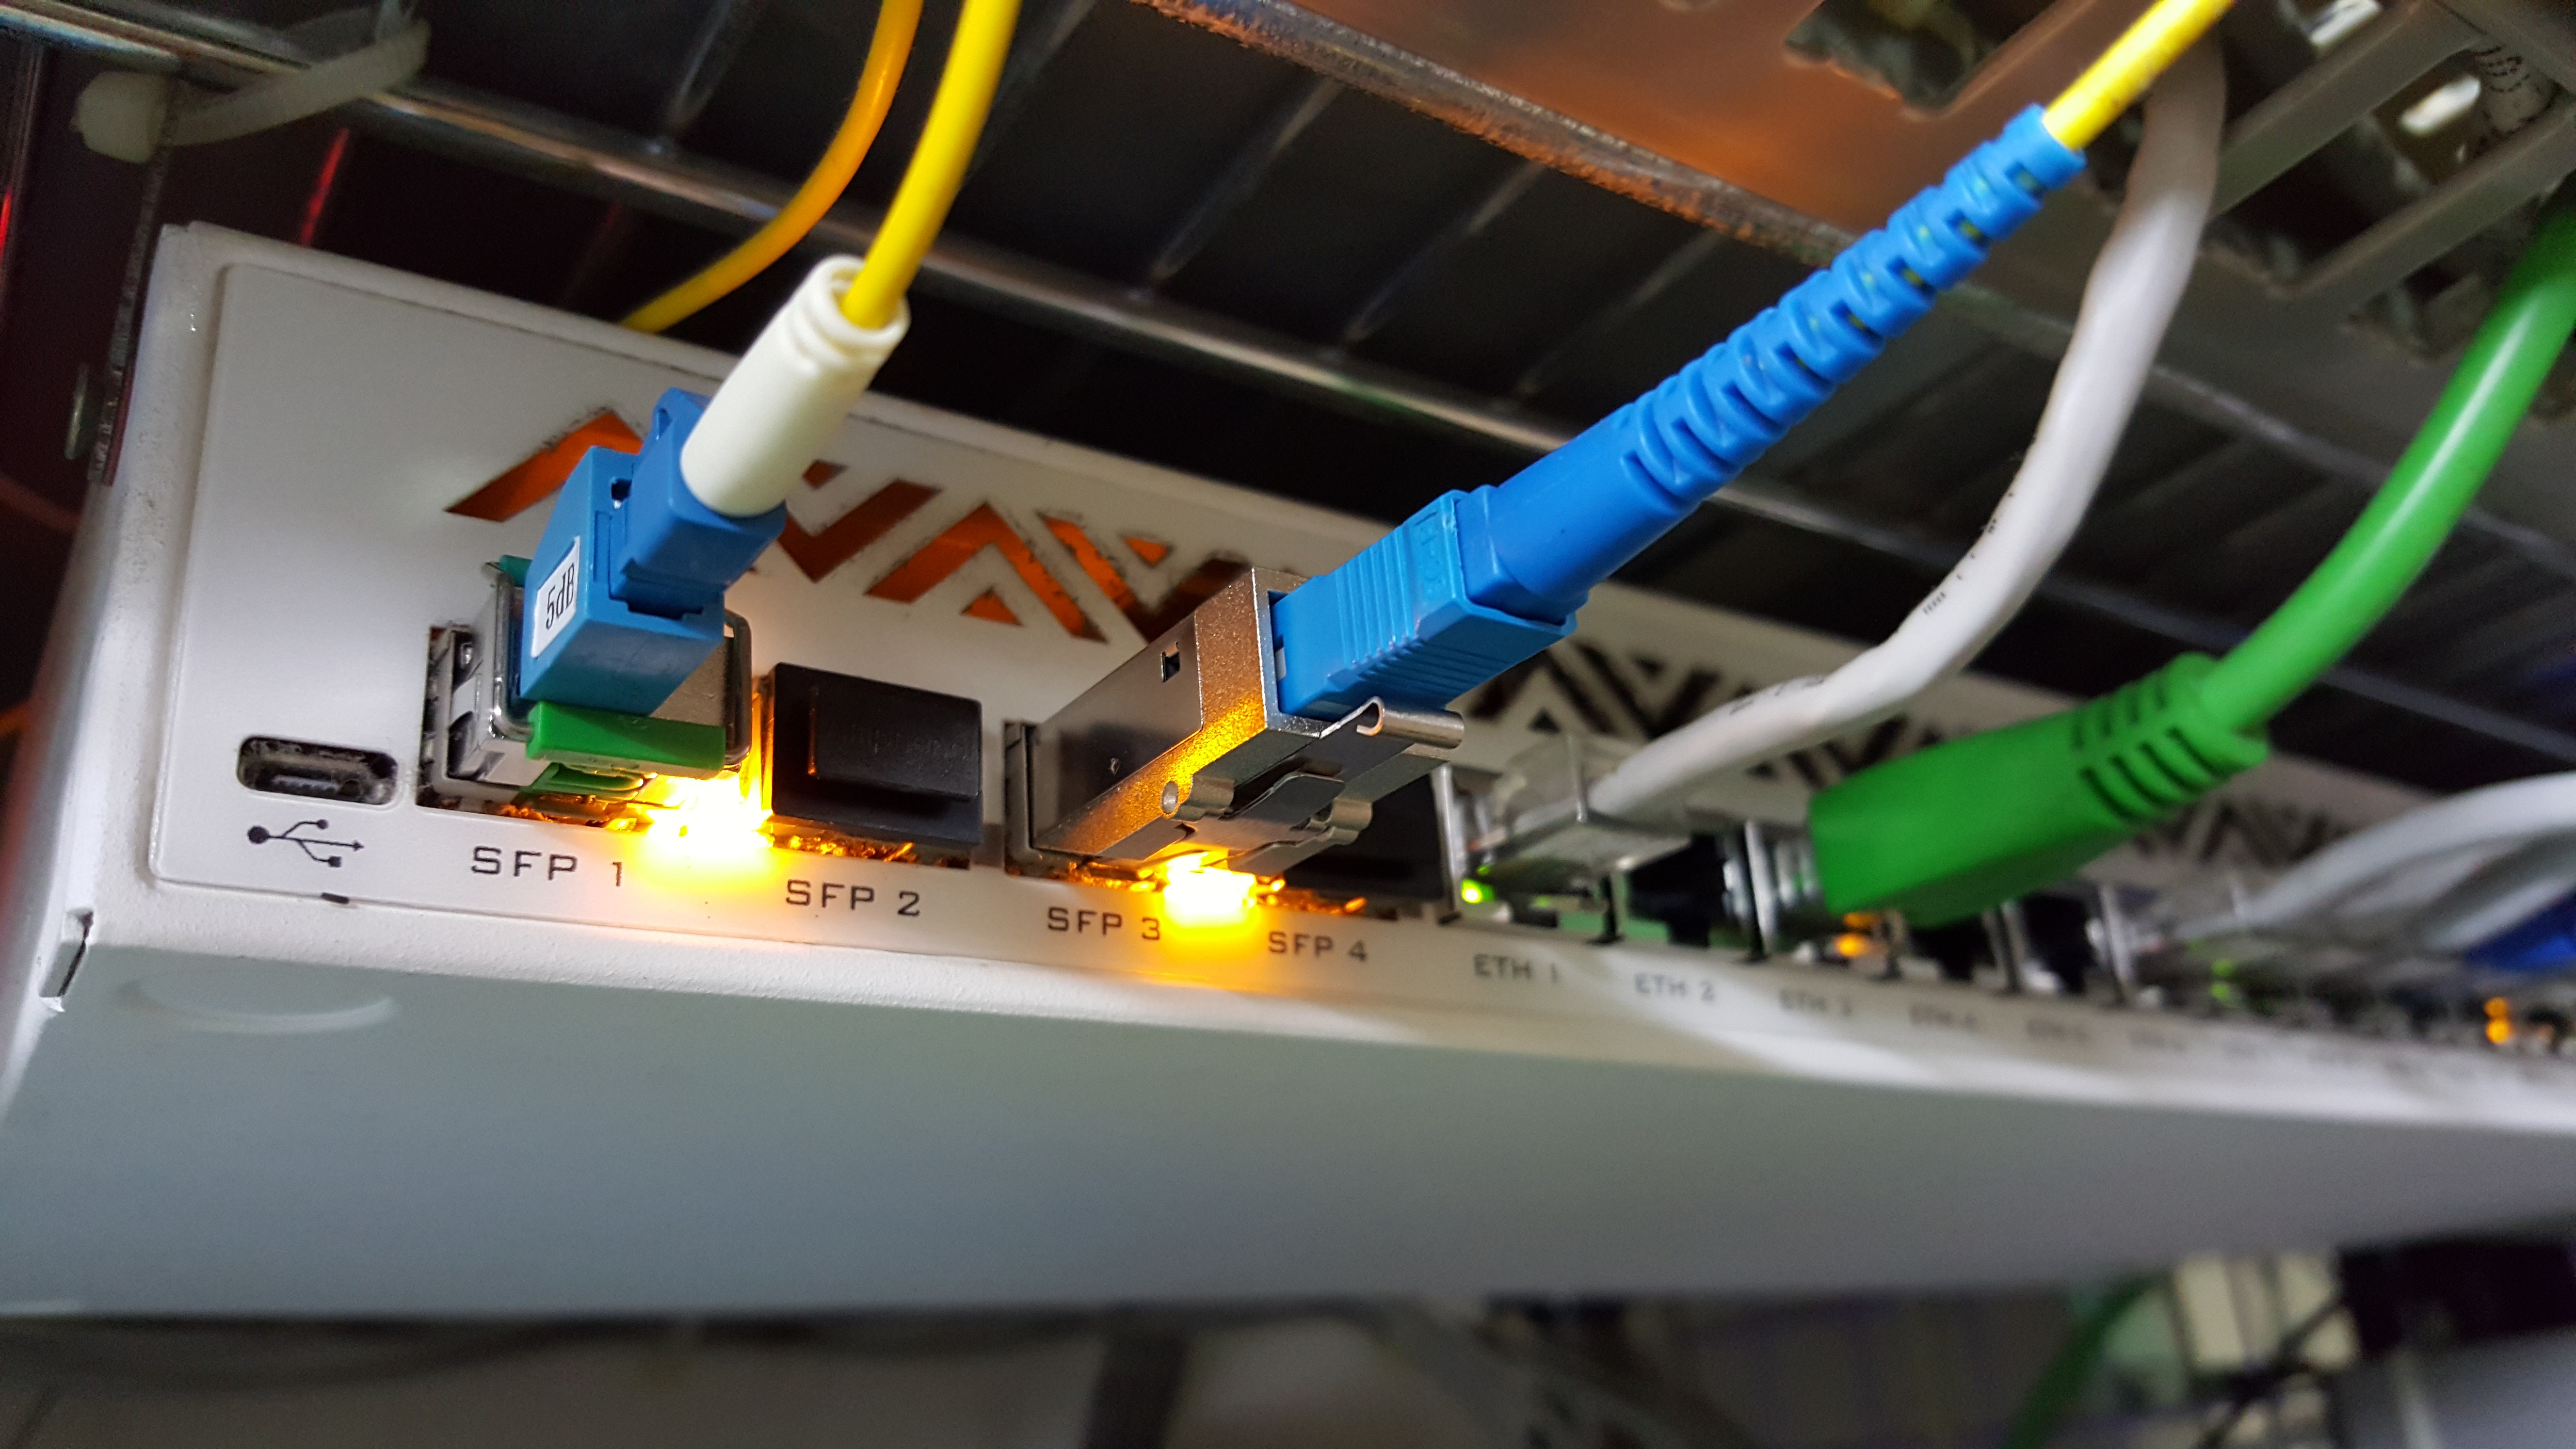
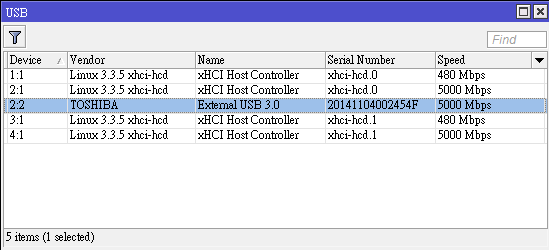
MikroTik 10G 機器支援的1.25G SFP 列表

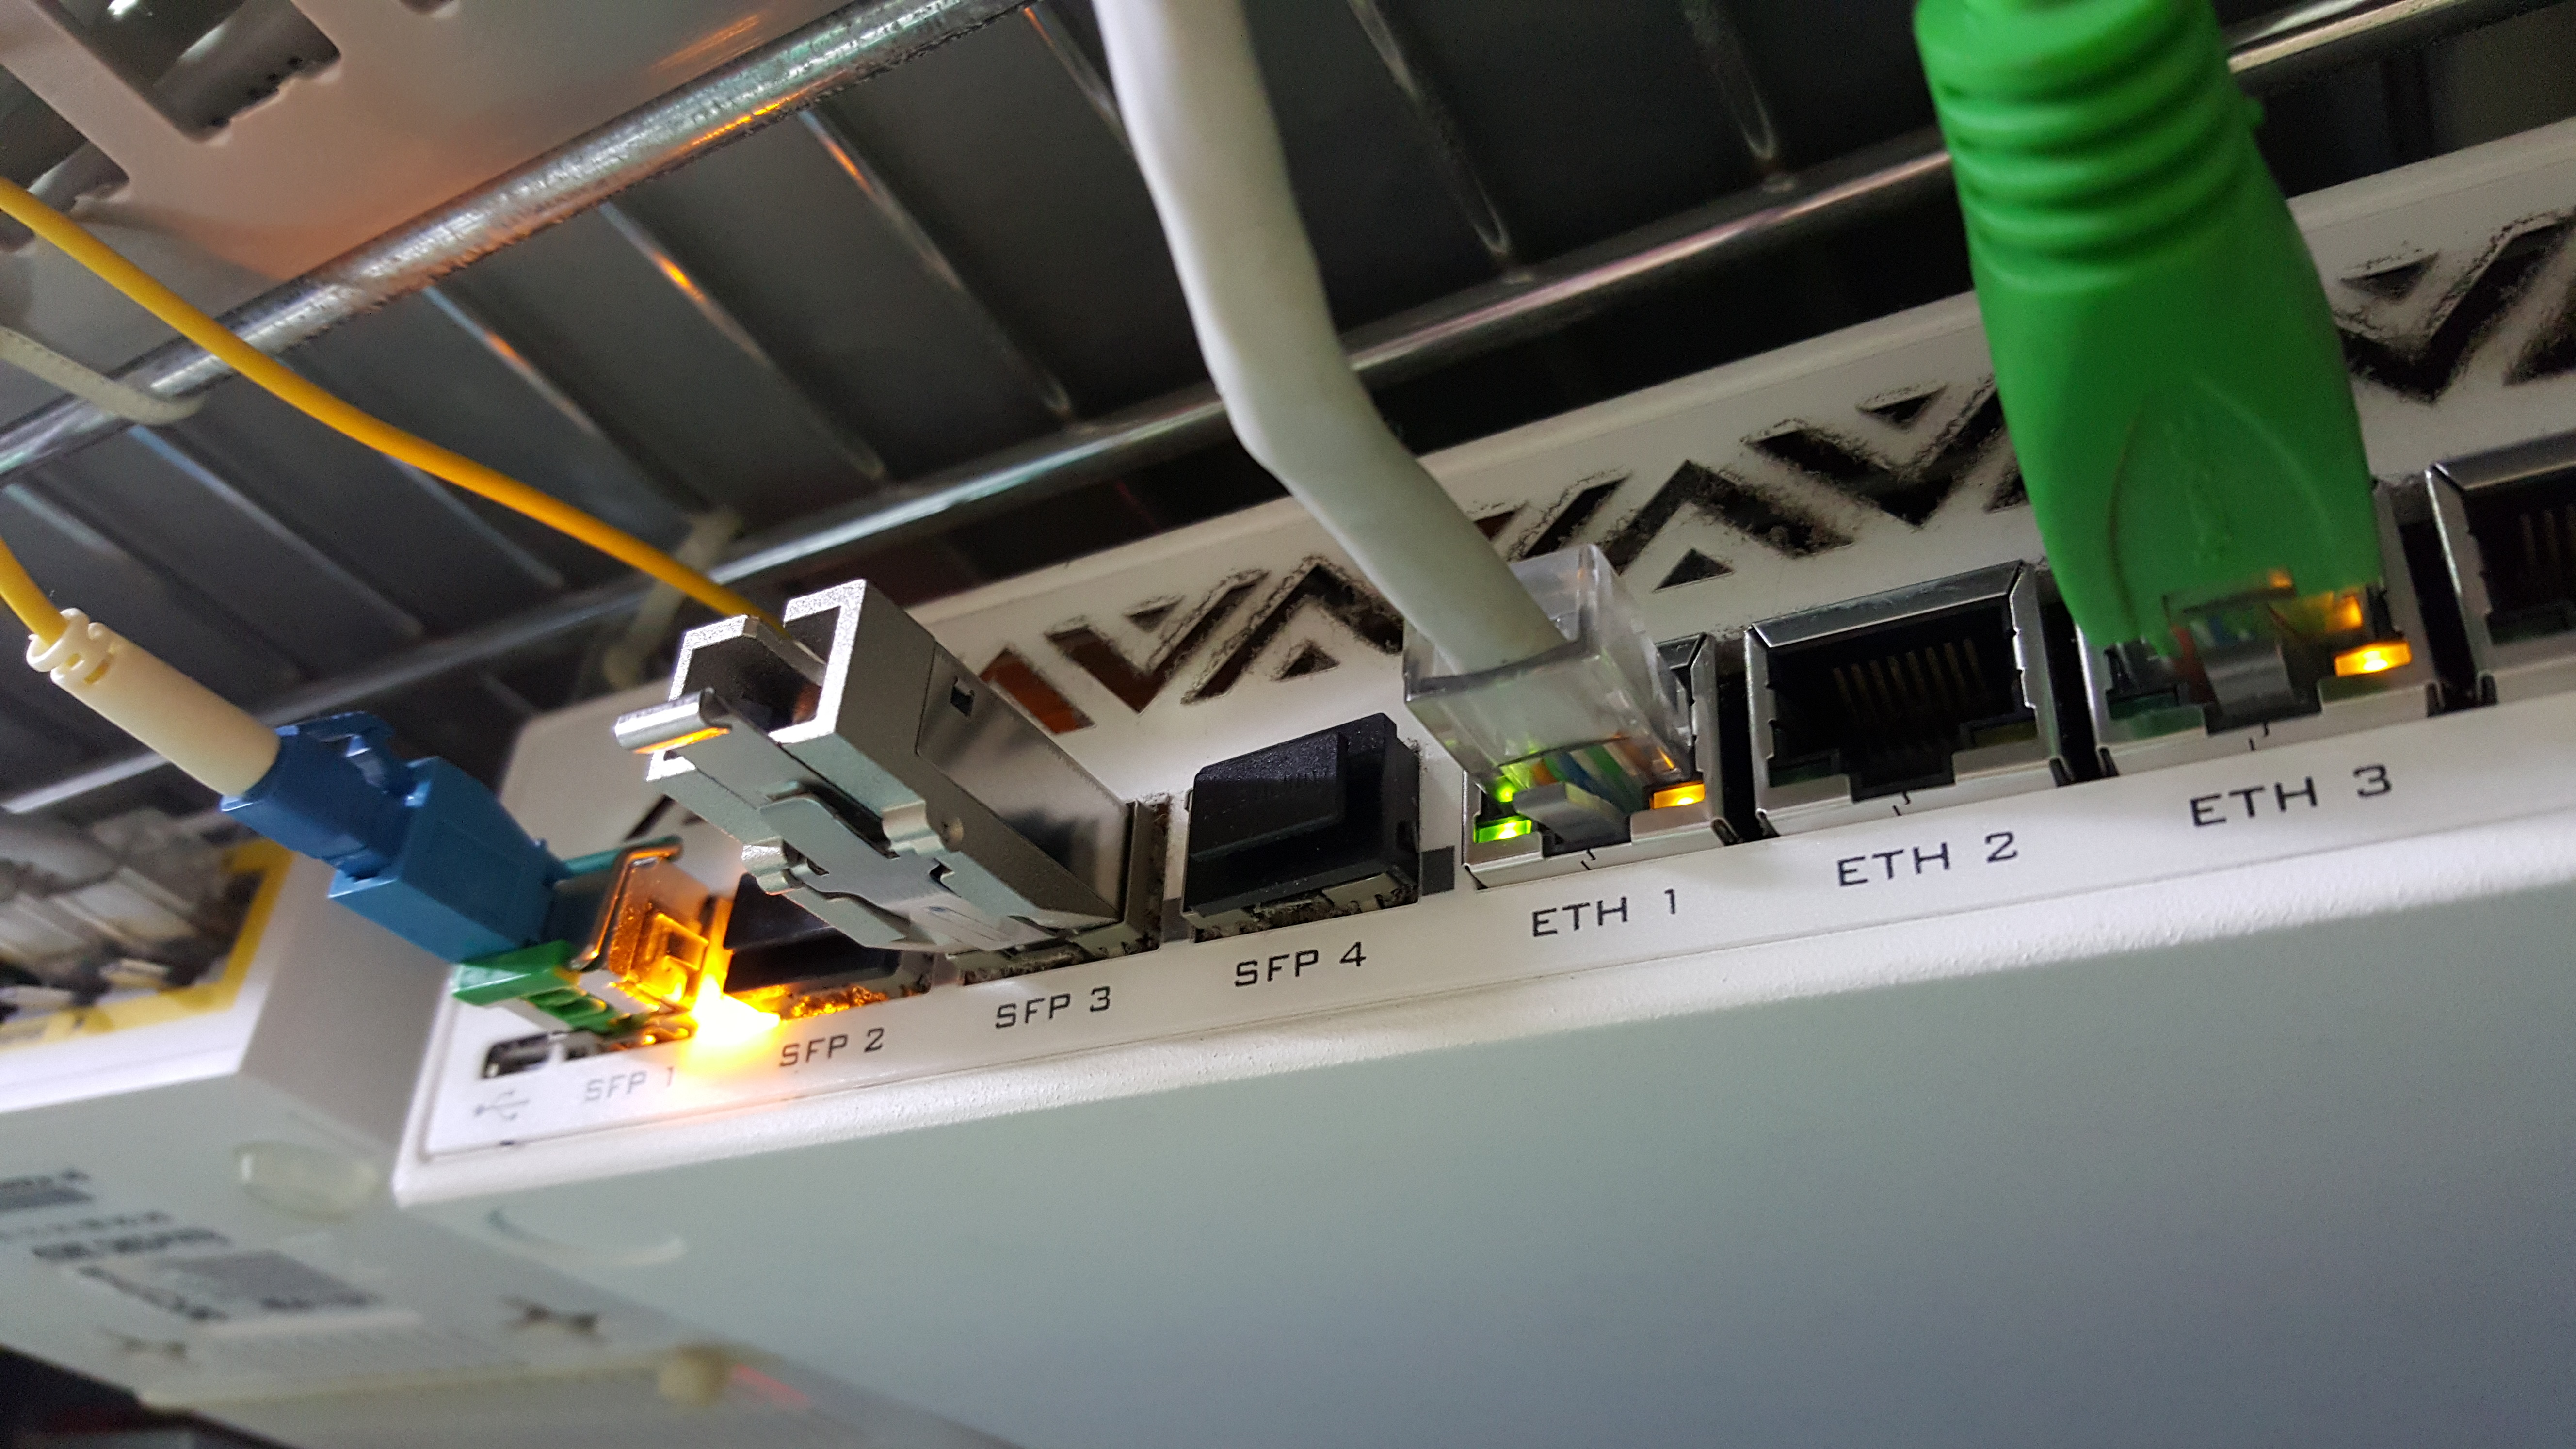
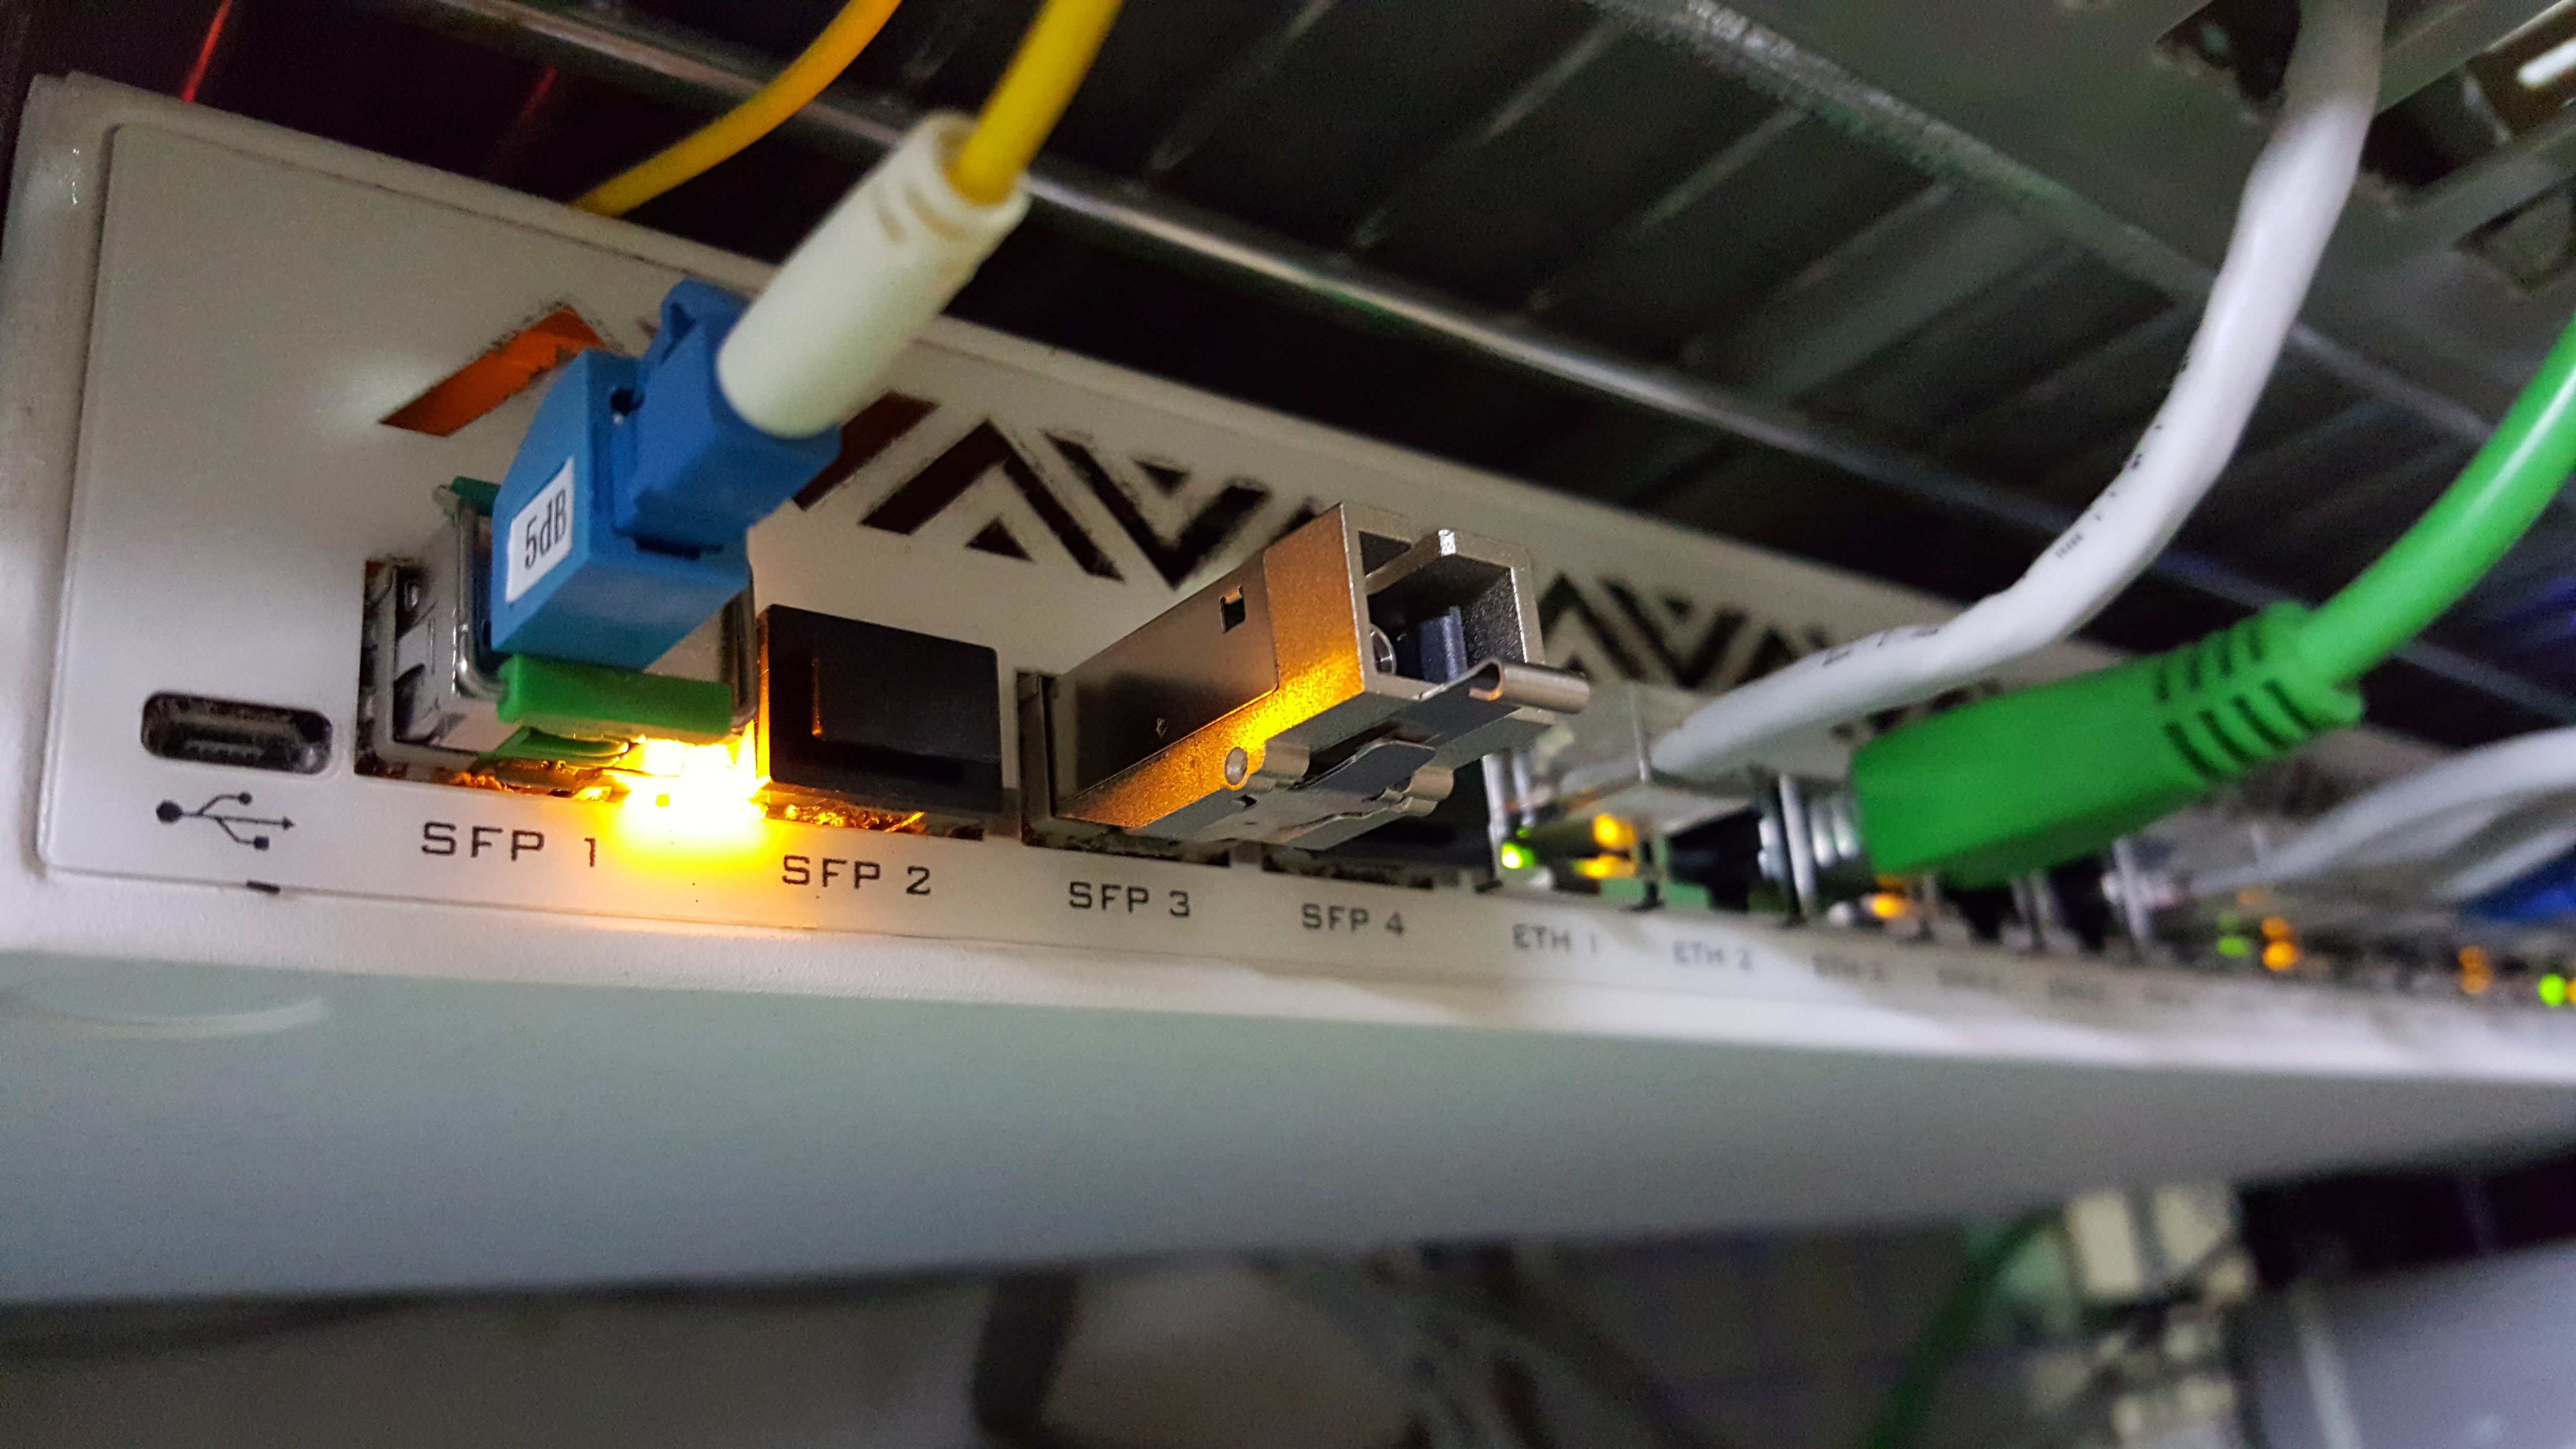
I found some interesting issues today when interconnecting MikroTik SFP and SFP+ ports. If you put a 10G module in an SFP+ cage and link it to another 10G module, there are no issues. Same thing with 1G modules but when you start mixing SFP+ cages with SFP modules things get strange. Strange in that sometimes it works and sometimes it doesn’t.
Example:
These restrictions come due to certain hardware design limitations according to Krisjanis, a MikroTik engineer. Here is a chart that covers a few of these combinations and capabilities:
One other thing I learned is that many 0G transceivers will link to 1G devices if you set them both to auto negotiation off. Good luck with MikroTik SFP’s!

hAP ac²


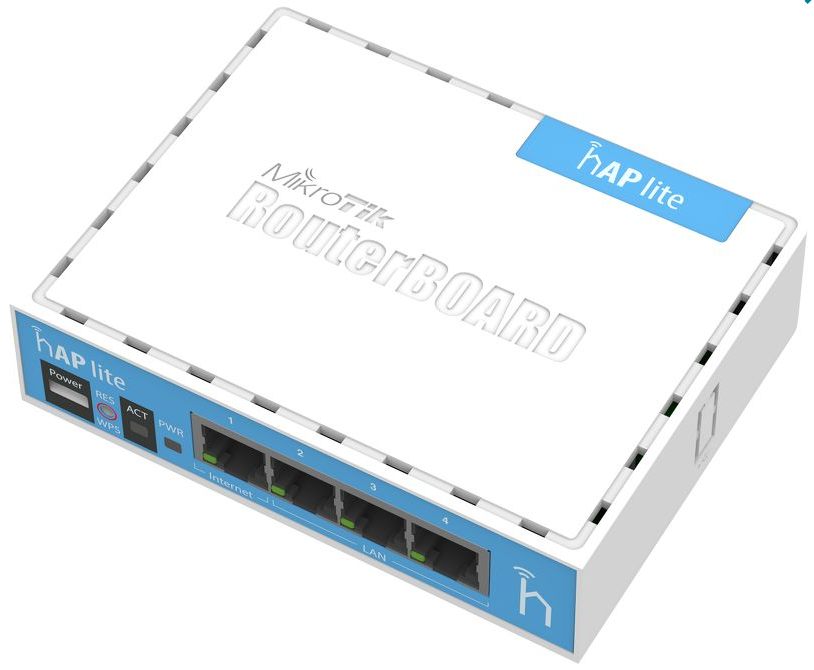
RB952Ui-5ac2nD hAP ac Lite
型號:RBwAP2nD

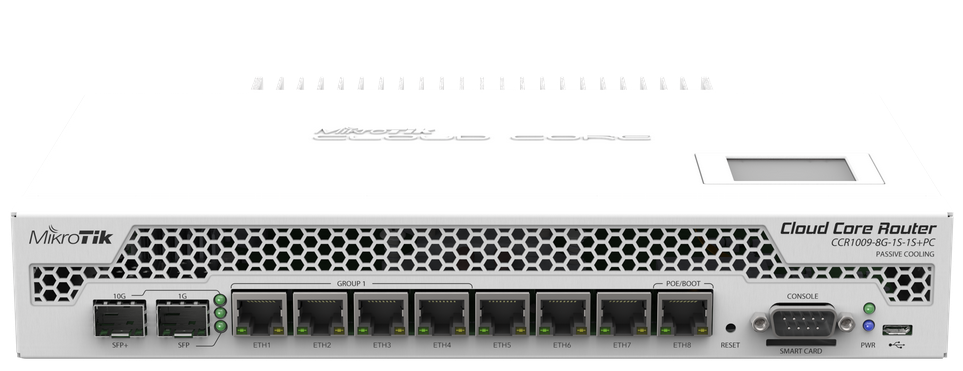
MikroTik 高階路由器CCR1009-8G-1S-1S+PC (無風扇設計)
最新產品 RB850Gx2 (RB450G昇級版) 500MHz雙核心PPC處理器

MikroTik RBcAP2n cAP 2n 吸頂式 無線AP


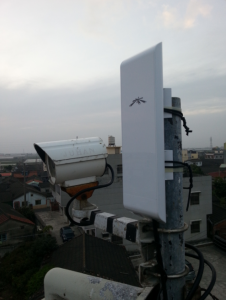
MikroTik SXT SA ac 802.11ac RouterOS 大功率室外無線網橋

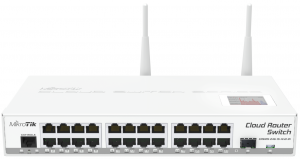
CRS125-24G-1S-2HnD-IN 24口 + 300Mbps 無線路由器
RB2011UiAS-2HnD-IN 10網口 300Mbps 無線路由器
UBNT UniFi UAP-AC 802.11ac 吸頂無線雙頻AP 速度1300Mbps

MikroTik SXT Lite5 /SXT 5nD r2 5.8G 300M 無線網橋 500mW
戶外型 無線基站/無線網橋 UBNT NanoStation M2 NSM2 NS M2 2.4G 300M

免費贈送 xxxx.ros.tw & xxxx.unifi.tw 子域名
為你的RouterOS 設定NAT loopback (Hairpin NAT)
封鎖mac範例
增加中
RouterOS V7 OPEN-VPN SERVER 建立證書教學(最新版)
MikroTik RouterOS 配置OPEN VPN(舊文)
Mikrotik IPSEC Site-to-Site 設定教學
RouterOS Graphing 的設定方法 (MRTG流量圖)
UniFi Controller AC控制器安装在 Debian
修改 WordPress 上傳檔案大小限制設定(PHP 上傳大型檔案)
如果在 WordPress 架設的網站上傳大型檔案時遇到錯誤,可以參考這裡的步驟教學來解決。
一般使用 WordPress 所架設的網站,在預設的設定之下是沒有辦法上傳太大型的檔案的,我們可以在「上傳新媒體檔案」的頁面看到目前網站設定的最大上傳檔案大小。

WordPress 上傳檔案大小限制
如果上傳的檔案大小超過限制,就會出現這樣的錯誤訊息:

WordPress 超越此站檔案大小上傳限制錯誤
以下我們介紹該如何修改網站的設定,解除上傳檔案大小的限制,讓我們可以上傳大型的檔案。
上傳檔案的限制只要是由 PHP 的設定所控制的,而 PHP 的設定可以透過下面幾種方式修改。
functions.php第一種方式是修改 WordPress 佈景主題的functions.php,加入這幾行設定,而裡面的各個設定值就依照個人的需求來調整:
@ini_set( 'upload_max_filesize', '16M' ); // 單一檔案大小上限
@ini_set( 'post_max_size', '32M');        // POST 資料大小上限
@ini_set( 'memory_limit', '64M' );        // 記憶體上限
@ini_set( 'max_execution_time', '300' );  // 執行時間上限,單位為秒
但這種方式不見得每一個人都可以使用,我個人也不喜歡使用這樣的方式。如果無法使用這種方式的人,可嘗試下面幾種其他的方式。
php.ini最標準的做法是直接修改 PHP 的 php.ini 設定檔,找到對應的設定,修改成自己需要的數值。
修改單一檔案大小上限:
; Maximum allowed size for uploaded files.
; http://php.net/upload-max-filesize
upload_max_filesize = 16M
修改 POST 資料大小上限:
; Maximum size of POST data that PHP will accept.
; Its value may be 0 to disable the limit. It is ignored if POST data reading
; is disabled through enable_post_data_reading.
; http://php.net/post-max-size
post_max_size = 32M
修改記憶體上限:
; Maximum amount of memory a script may consume (128MB)
; http://php.net/memory-limit
memory_limit = 64M
修改執行時間上限(單位為秒):
; Maximum execution time of each script, in seconds
; http://php.net/max-execution-time
; Note: This directive is hardcoded to 0 for the CLI SAPI
max_execution_time = 300
最後重新啟動 PHP 讓新設定生效:
sudo service php5-fpm restart
如果您的網頁伺服器是使用 nginx,除了修改上述的 PHP 設定之外,nginx 本身的檔案大小限制設定也需要一起修改,否則就會出現這樣的錯誤訊息:
2016/02/01 15:31:45 [error] 20830#0: *1143155 client intended to send too large body: 3164703 bytes, client: 108.162.222.88, server: blog.gtwang.org, request: "POST /wp-admin/async-upload.php HTTP/1.1", host: "blog.gtwang.org", referrer: "http://blog.gtwang.org/wp-admin/post.php?post=13249&action=edit"
若是在 nginx 的 log 檔中看到這樣的錯誤,就在nginx.conf 設定檔中加入這一行設定就可以解決了:
http {
  client_max_body_size 32m;
}
然後重新啟動 nginx 讓新設定生效:
sudo service nginx restart
或是重新載入設定也可以:
sudo service nginx reload
修改完成之後,WordPress 上面的檔案大小限制就會是新的設定值。

可上傳大檔案的 WordPress 網站
這樣上傳大型檔案就沒有問題了。

WordPress 上傳大檔案
參考資料:PHP Manual、Kinsta、nginx
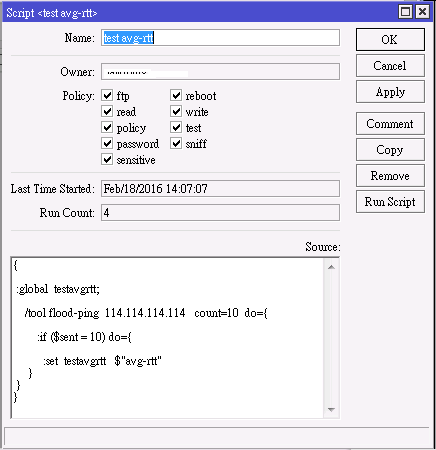
例如想要監控某一條線路的品質,
當ping的延遲超過所設定的位準後,
則執行預先設定好的動作。
{
:global testavgrtt;
/tool flood-ping 114.114.114.114 count=10 do={
:if ($sent = 10) do={
:set testavgrtt $”avg-rtt”
}
}
}


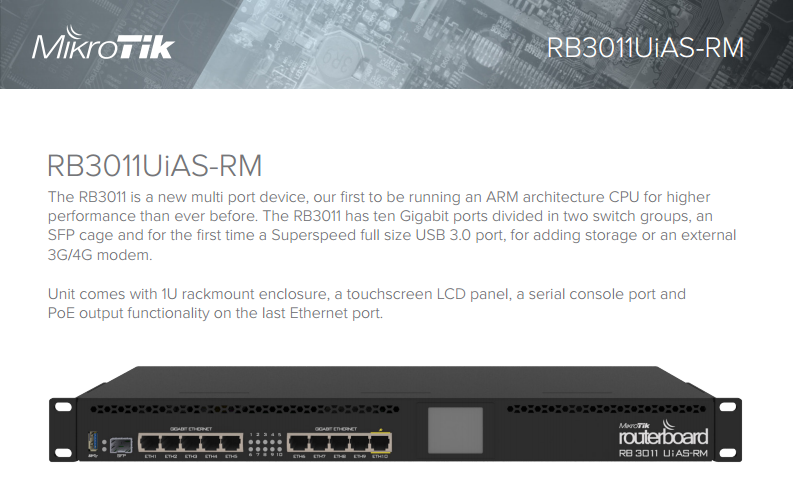
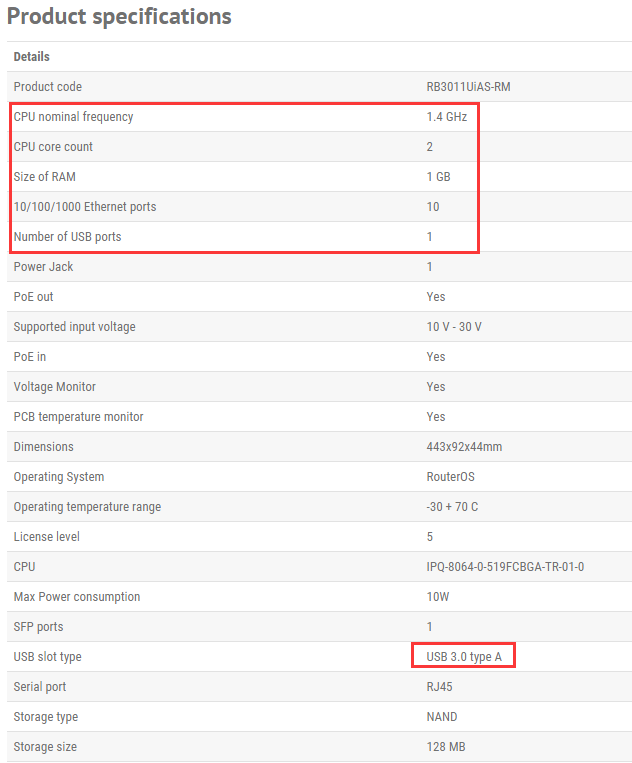
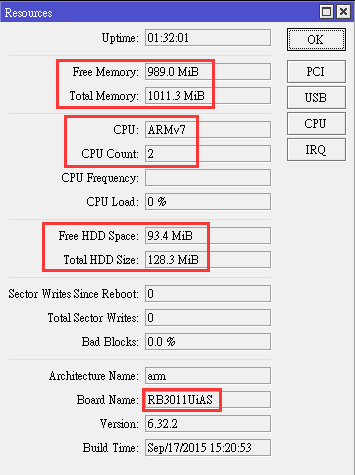


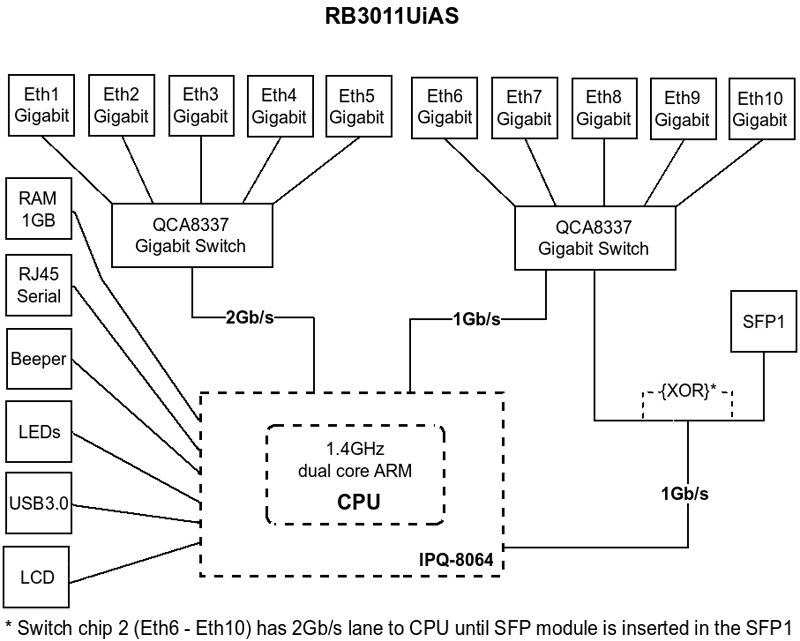
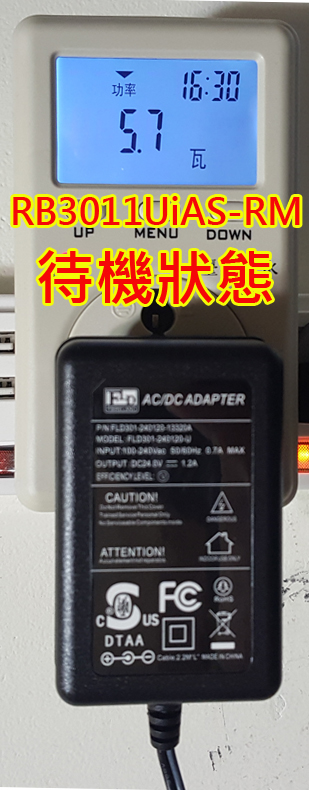
http://i.mt.lv/routerboard/files/rb3011U-qg.pdf

把你的ROS裝進去VPS裡面,例如阿里雲 騰訊雲 都可以.
先在你所購買的vps上面預先裝好ubuntu或是debian都可以,然後透過dd寫盤的功能直接把官方的CHR img映像檔寫盤到vps的硬碟上。
底下是寫盤的命令代碼,直接複製貼上後重開機就變成RouterOS的系統辣!
完成之後只要購買授權就能長久使用,就算vps搬家,購買的授權也可以繼續用。
免費版的限制是1M流量.
60天試用版則是完全沒有限制,60天試用版需使用MikroTik官網註冊的會員帳號配合使用.
wget http://download2.mikrotik.com/routeros/6.36.4/chr-6.36.4.img.zip -O chr.img.zip  && \
gunzip -c chr.img.zip > chr.img  && \
mount -o loop,offset=33554944 chr.img /mnt && \
ADDRESS=`ip addr show eth0 | grep global | cut -d' ' -f 6 | head -n 1` && \
GATEWAY=`ip route list | grep default | cut -d' ' -f 3` && \
echo "/ip address add address=$ADDRESS interface=[/interface ethernet find where name=ether1]
/ip route add gateway=$GATEWAY
 " > /mnt/rw/autorun.scr && \
umount /mnt && \
echo u > /proc/sysrq-trigger && \
dd if=chr.img bs=1024 of=/dev/vda && \
reboot
第二種方式是用虛擬機+IMG方式,就是在你的VPS預先裝好ubuntu,
然後再安裝虛擬機的套件軟體後再把ROS的IMG給上傳進去運行。
本網站的ros是使用第二種方式+購買一般的L5授權註冊,
這種的img就跟克隆一樣,你懂得~。
此網站VPS目前運行的有Ubuntu+wordpress+RouterOS,一機當二機用.